Chris Padilla/Blog
My passion project! Posts spanning music, art, software, books, and more. Equal parts journal, sketchbook, mixtape, dev diary, and commonplace book.
- Reading headlines on LifeHacker about a neat new service making a splash across the pond called Spotify — where you can legally stream a seemingly infinite library of music.
- From that same evening: ripping Plastic Beach by the Gorillaz onto my computer, loading it into my iTunes library, and transferring it to my iPod.
- Client app that first sends an email from a template page (which is aware that this should only be sent once.)
- An application layer that receives the request, then adds it to...
- A queue, which waits for an available worker before passing off the email message
- Email Sender Worker, which actually formats and sends the email.
- Never Meant
- Dawn from Pride & Prejudice (2005)
- Weird Fishes/Arpeggi
- North Central Texas Winds
- I'm Old Fashioned
- The Sound Design of Pedestrian Call Buttons
- Tending the Garden With Tag Pages
- Software Without Scale
- Two Chords
- Compass
- Three Years of Blogging
- Critical Thinking and Coding Agents
- Extending Functionality Through the JS Proxy Class
- Handling Errors in LangGraph (and Other State Machines)
- Full Page Video Across Devices with React
- Testing Time Interval Code
- What It Is by Lynda Barry
- So Many Books by Gabriel Zaid
- Art & Fear by David Bayles & Ted Orland
- Sam & Max: Surfin' the Highwa by Steve Purcell
- Robin Sloan's Blog on media & technology
- Austin Kleon
- Matt Webb's Interconnected
- Melon King
- LGR
- Soft Skills Engineering
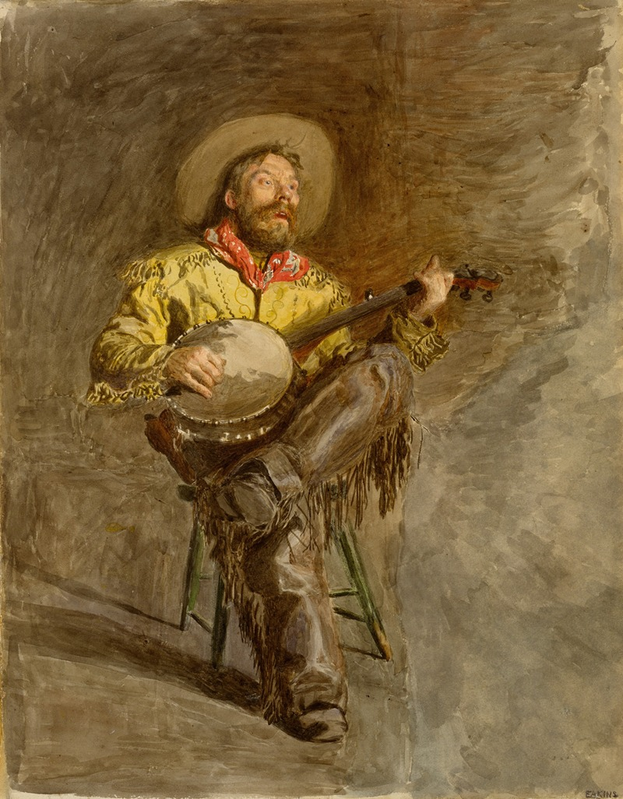
- Artvee
- Moving to Boulder 🏔️
- Revisiting a childhood hobby ⚡️
- Fun trip to Miami for work 🦩
- Enjoying being engaged 💍
- Home in Houston for the holidays 🎄
- Several good movies seen. Harry Potter in theaters, It's A Wonderful Life also on The Silver Screen, Good Will Hunting, Hamnet, KPop Demon Hunters, Whiplash 🎥
Art & Fear On Approval
And why making with or without it takes courage:
You're expected to make art that's intimately (perhaps even painfully) personal — yet alluring and easily grasped by an audience that has likely never known you personally.
When the work goes well, we keep such inner distractions at bay, but in times of uncertainty or need, we begin listening. We abdicate artistic decision-making to others when we fear that the work itself will not bring us the understanding, acceptance and approval we seek. For students in academic settings, this trouble is a near certainty; you know (and you are correct) that if you steer your work along certain paths, three units of "A" can be yours. Outside academia, approval may be clothed in loftier terms — critical recognition, shows, fellowships — but the mechanism remains the same.
With commercial art this issue is often less troublesome since approval from the client is primary, and other rewards appropriately secondary. But for most art there is no client, and in making it you lay bare a truth you perhaps never anticipated: that by your very contact with what you love, you have exposed yourself to the world. How could you not take criticism of that work personally?
Beethoven – Rage Over A Lost Penny
Will this piece still be funny now that pennies are no longer being produced?
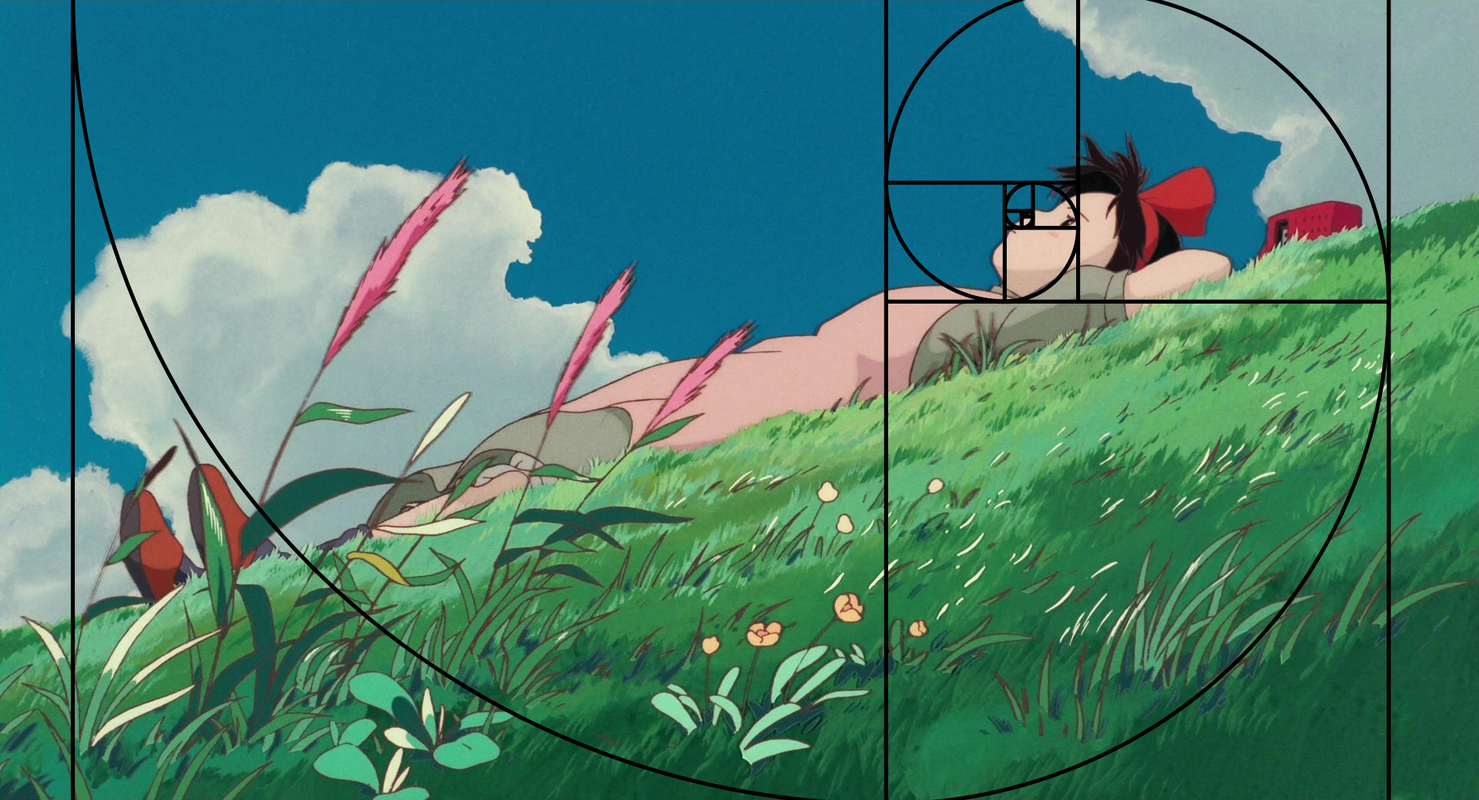
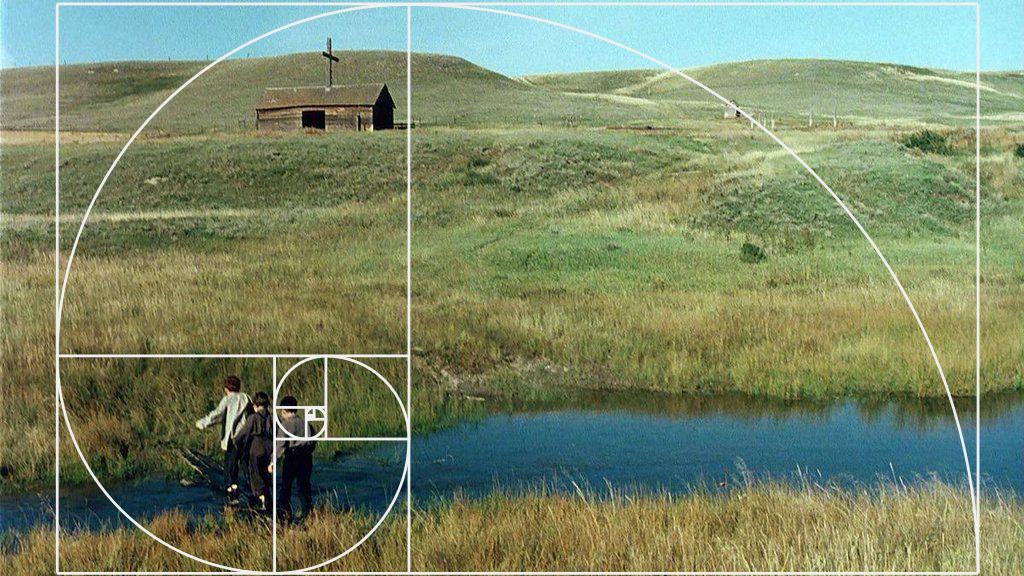
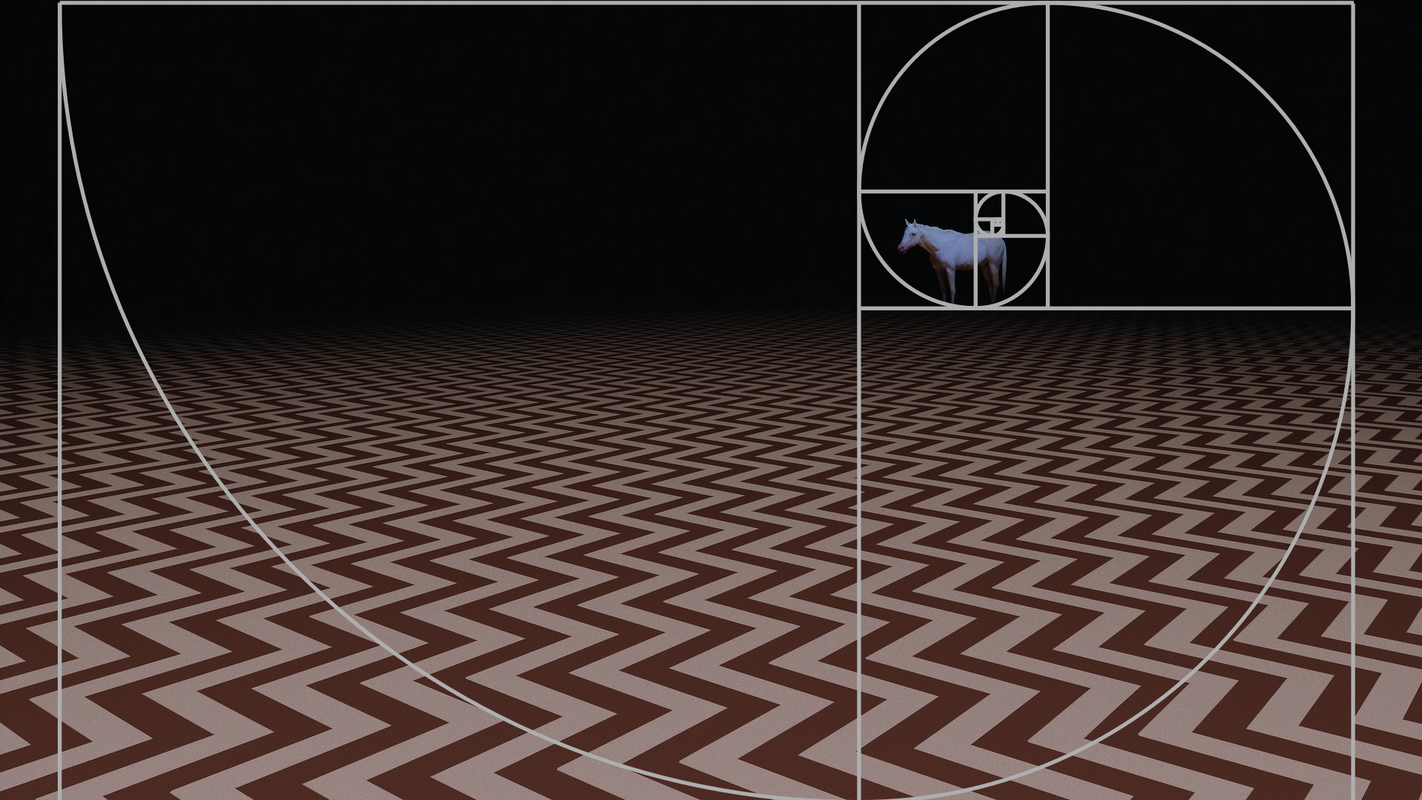
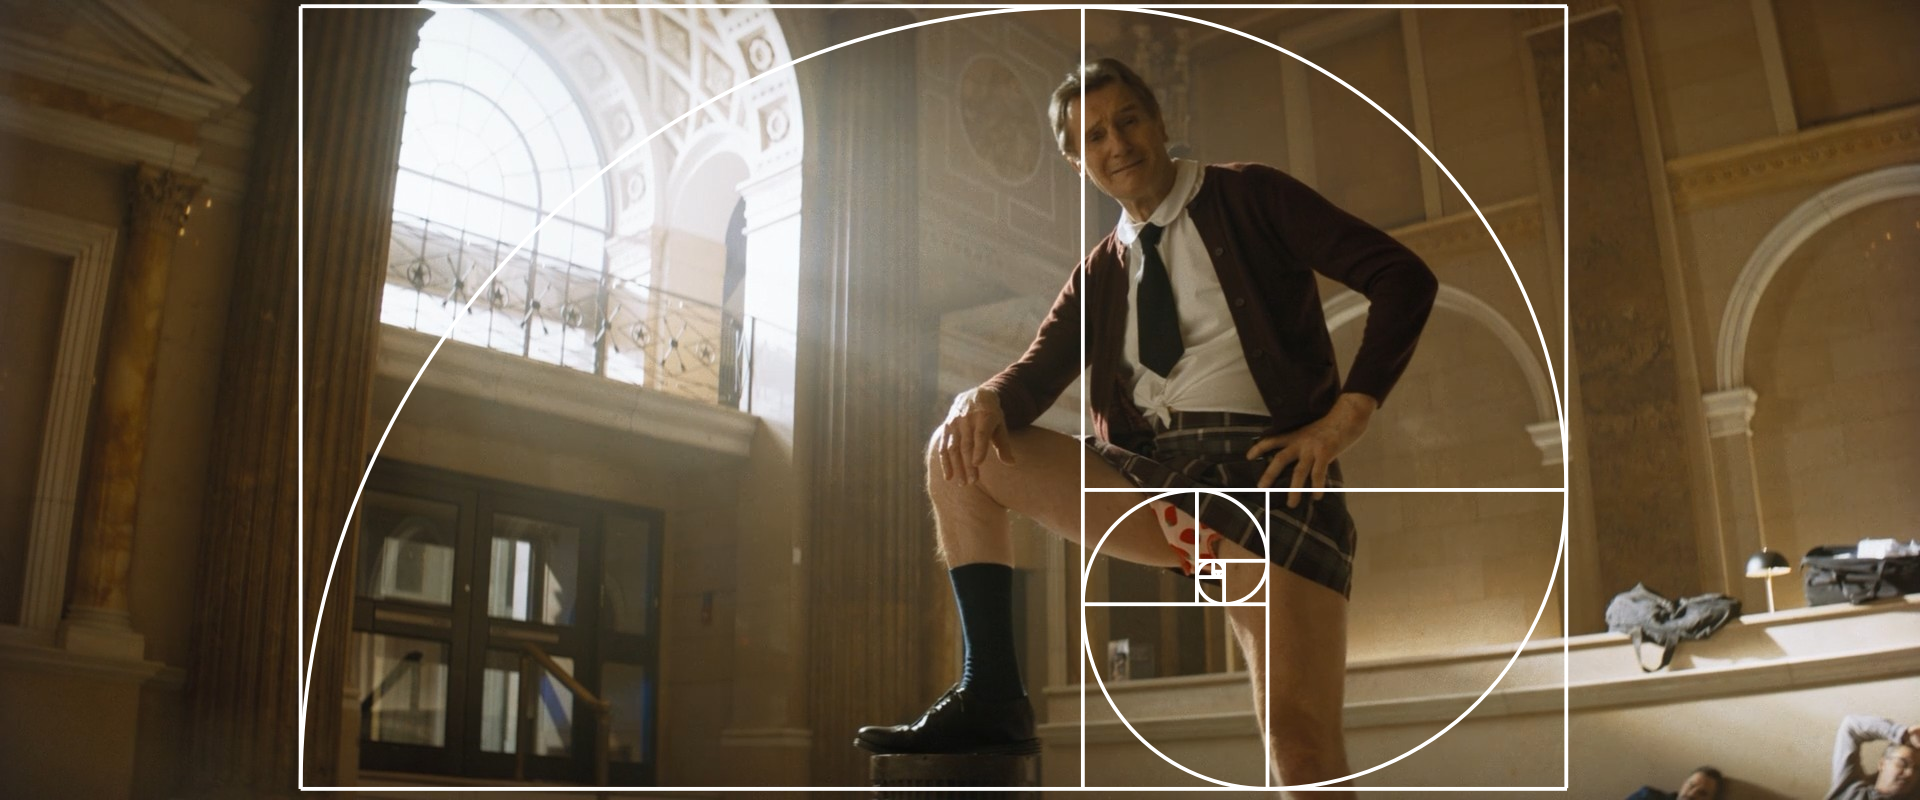
Golden Ratio In Film
Western music is founded on a phenomena in nature. Certain relationships between frequencies create a harmony, a certain sweetness, where there is little dissonance. Art seems to have a similar counterpart in composition through the Golden Ratio.
I've been having fun crawling through the One Perfect Shot Twitter account to find film screens of this composition principle in action. A few of my favorites below:
A Lifetime of Music Listening
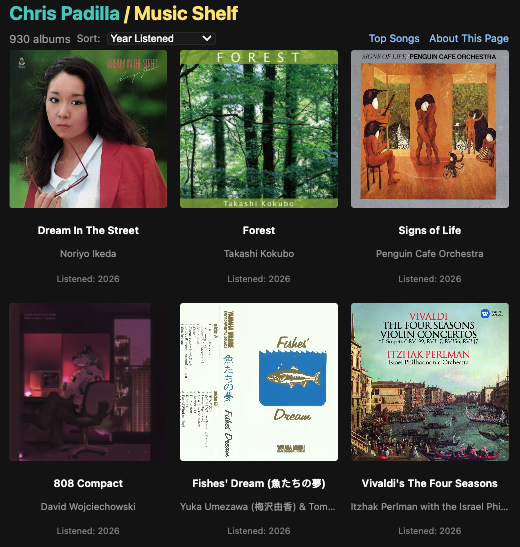
In short — I made a new webpage to chronicle my listening history. Woohoo!
In the distant past of 2010, I distinctly remember two things:
A year later, I was shocked by the instantaneousness of having access to all music ever recorded.
15+ years later, I find my relationship with listening to music vastly different from those days. Teen-specific sentiments aside! I'm listening to a broader range of music, going deeper into sub-genres, and have heard international artists I otherwise would have never been exposed to. That's all good and well!
At the same time, I find myself not listening as deeply, not listening to whole albums, and allowing a large portion of my listening to be guided by unseen forces. Perhaps the pace of life has changed this, perhaps age, perhaps the coming and going of fascinations and interests.
Whatever the reason, I had a moment ripe for reconsidering my listening habits and the technology that supports them.
CDs
Visiting my childhood home, I found stowed away a bunch of physical CDs that I hadn't thought of, let alone heard, in ages. Tucked in jewel cases, some in plastic sleeves from friends who burned playlists for me, nostalgia ensued. I popped several into a physical CD player. (One of those big 2000s era boomboxes was available. After that, I popped one into my car. Being built in 2016, it still has a CD player.) I felt the nearly forgotten anticipation of waiting for the music to start, the tactile satisfaction of placing media into it's reciever.
Seeing a natural trail of my listening history in physical form, I realized this sort of thing was too important to me to leave it to chance, tech companies that come and go, etc. I enjoyed being curious about what caught my ear, collecting it as a source of inspiration, and saving it in a way that it can serve as a time capsule later. There's a seeming urban legend about how Andy Warhol would wear a different perfume daily for a couple of months so that he could then remember that point in time. Music has a similar effect; it's a great memory maker.
Unfortunately, physical CDs are not the answer. I found out all too soon that my favorite Japanese City Pop CD's would be $30 each + international shipping. Too many recent favorites don't do print runs of their music. Even so, the practical reality is that most of my listening is done through apps. A physical purchase would be reserved for special albums, not for the entire collection.
It begged the question — what was I really trying to accomplish? If it were to be more intentional about my listening and saving my listening, the nerdiest answer I could come up with was a webpage. I had remembered those times curating my iTunes library intentionally, and I was suddenly interested in doing the same on my own domain.
The Data Wrangling
The development was largely trivial — the project's meat was in data collection and cleanup. I had to pop my physical CD's into a spreadsheet. But that only accounted for a fraction of my listening. It took crawling my iTunes library from ~2012 when I made the switch to streaming, as well as exporting my Spotify playlist data.
With that done, several rounds of lassoing data ensued. More memories came flooding back — it took considerable effort to keep good hygiene with an iTunes library. It's easy for naming conventions to get off, for the same artists to have different names based on stylization (ex: Arcade Fire and The Arcade Fire, or Tune-Yards and tUnE-yArDs), and for album art to be inconsistent. At times, it was frustrating. Now, though, it was the right amount of resistance to help me slow down and really savor the collection as a whole.
Tagging by year listened was a goal, as this was meant to reflect a timeline of listening. The 2000's required big ol' estimates, while for 2016 on I could use Spotify listening data.
While I was at it with my exported Spotify data, I decided to transfer over the top songs by year. This feature is universally beloved — I listened to my first (2016) playlist for years after the fact. Spotify doesn't cover the entire landscape of my listening, but it'll do. Those tracks were tossed into JSON and are now listed under /topsongs/{year}.
Violà! A full day's effort later, and I have 930 albums listed on my new Music Shelf page. I know that to most readers this is just a list of albums. But for the curator, this is a delightful wall of memories and favorite melodies that spans a mile long.
The page itself is simply a list with cover art, album, and artist. Of course, there's more I could do. Were I feeling particularly clever, I could whip up integrations with Spotify for further automation. BUT! The point is for this to be manually maintained. To have a process that even, ever so slightly, resembles the modern-day equivalent of getting into the car, driving to FYE, walking through the stacks, making a selection, bringing it home, and THEN putting it on the shelf. It allows time to live more deeply with the music.
Will this change my listening? It already has. Metaphorically, I've gone from only ever listening to the radio to finding my favorites and spinning them on repeat. Even without abandoning Spotify ("Yet you participate in society"), I have a reason to manually add albums, skip the MASSIVE UI encouraging I hop to the next listening destination right away, and get to know albums better. (Significant for me, since for a time I was almost exclusively listening to algorithmically suggested tracks before it got to be too much like the snake eating itself.)
The aim is to balance the best of both modernity and older practices. Like any choice around modern technology, our approach informs the tools we use and how we use them, not vice versa.
A Brief Explainer on Caching Strategies
The difference in speed between accessing data from disc and accessing from an in-memory cache is significant, by the magnitude of 10-100 in some cases. When serving data in our applications that is frequently accessed, we want to place a cache in front of the DB to increase speed and lighten up read access to disc.
How that cache is populated & read, however, takes careful consideration of requirements and trade-offs. Is it important for the cache to be highly consistent with the DB? Of the two, is it permissible for one to be eventually consistent? Do we want our application to manually manage write and read access to both data sources?
Following is an exploration of several strategies with their strengths and considerations:
Cache Aside (Lazy Loading)
Perhaps the most common pattern is to manage the cache strategy ourselves in the application with this gradual building of the cache. When requesting data, the cache is checked first for a given value. On a cache-miss, the application will then query the DB, and update the cache with the result.
Several fine benefits here: We have a high degree of control in the caching strategy — setting different TTL's based on certain parameters, custom caching keys, and our cache only contains data that is actually requested. With that control comes overhead — we will need to manage invalidation ourselves and, additionally, we must accept that the first request for a piece of data may be slow before the cache is populated with it. The tradeoff for an individual request having higher latency, however, is often worth it for overall higher throughput across the system.
Write Through
Here, if we wanted our application to allow for abstraction of our data writes, we could encapsulate that logic in the services that are responsible for our DB and cache interactions.
One such way is a write-through strategy. Here, we have separate services for the DB and cache. Our application is writing to the cache, which then updates the DB synchronously. This has a few tradeoffs: Slower writes since we are waiting for both the DB and the cache to finish their writes, and we may be storing data to the cache that is never read. The benefit, however, is that the cache is never stale, and the data is highly consistent. Ideal for financial applications where consistency is a requirement.
Write Behind
Similar to the above strategy, we are writing to the cache, and the database is updated from the cache. However, this is done asynchronously. This change will reduce the latency of our writes, though we are then at risk of potential data loss if the cache is down before a write completes to the database. This strategy is well-suited for logging systems and metrics where occasional data loss is acceptable in exchange for a high volume of fast writes.
Write Around
This is similar to our Cache Aside strategy, except our database service manages the writes to cache. We gain the benefits of simplicity while maintaining flexibility with what we cache. Ideal for rarely-read data such as historical logs.
Refresh Ahead
If your application is in a situation where you can predict spikes in traffic, a refresh-ahead strategy is advantageous. Here, this read strategy proactively refreshes data before it expires, rather than waiting for a miss to trigger a reload. The cache will monitor the TTL, and when reaching a certain threshold, it automatically fetches a fresh value in the background. If traffic spikes are predictable, a warm-up time can be set. This is also advantageous if it is very expensive to calculate the result, such as with dashboard data.
When To Use Which Strategy
Most API's can benefit from a cache aside strategy that allows for a high level of control and flexibility. Exploring which alternative is suitable is dictated by the requirements — Write through for high consistency financial apps, write behind for metrics monitoring, write around for archival applications, and refresh ahead for computation-heavy data such as financial aggregations. In many cases — an app will employ different strategies for different portions of the application depending on the services provided.
Western Railway
A farewell to Boulder 👋
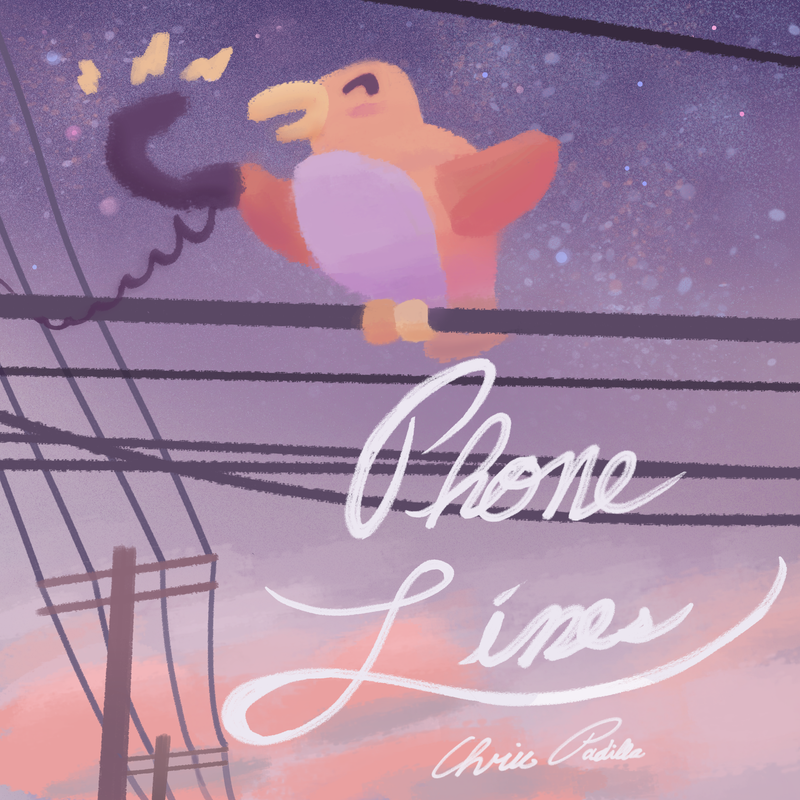
New Album – Phone Lines 📞 🎶 🐦
[phone rings]
Hey!!
I'm calling to let you know I have new music out — Phone Lines! It's a little Shibuya-Kei-inspired party. Enjoy some cutesy melodies and whimsey!
Anyway, my dog is calling me on the other line. Gotta go — talk to you later!
[hangs up]
Idempotency and Workers
Sending an asynchronous job off to a worker to handle a background task can lighten the load of a main application, but it takes careful consideration around how to ensure we aren't then seeing duplicate results. This is the idea around a portion of a system being idempotent. Here's how I navigated this in my own work this week:
Say that I'm building an email sending service. There are a few components:
Ideally, our Client app has some logic that already prevents multiple sends from, say, multiple clicks of the send button. What about an edge case where there was a network failure after a successful send, the user gets UI saying there was an issue, and resends the request?
Our backend system needs to be able to detect that a duplicate request is coming in and should not process it.
Solutions
Saving a unique request ID is the answer. Depending on where we want our idempotency check to occur, we can generate an ID, check against persistent state to see if we have already received that ID, and then decide to either pass it through if it's new or discard it if not.
A few options present themselves in our example. The client could perhaps be responsible for generating and checking the existence of a request ID. However, if there is an interruption on the client, we could potentially lose this ID.
A more consistent angle would be saving the ID with unique fields in persistent storage. A DB table could contain fields for the requestID, requestStatus, the userID, and templateType, allowing us to look up a document based on the userID and templateType to verify if this email has already been sent previously.
// Worker

export const emailHandler = async (event: EmailHandlerEvent): Promise<void> => {
  const {emailRequestID, recipient, subject, body} = event;

  // Idempotency check: Already done?
  const existing = await emailRequestStore.findByRequestID(emailRequestID);
  if (existing?.status === "completed") return;

  // Send and mark complete
  const {messageId} = await sendEmail({recipient, subject, body});
  await emailRequestStore.markCompleted(emailRequestID, messageId);
};
This serves an additional purpose: If the application is successful in sending the first request, then it receives confirmation that it succeeded back, but fails to notify the client due to a network failure, then the user receives UI to try to send the request through again.
In this case, with a dedicated store for the state of our request, our worker could mark the email send as complete, and on the subsequent client request, the application layer could run its idempotency check — see that there has already been a request, and additionally that it's completed, and simply return a 200 back to the client, noting that the email send was successful.
// Application Layer

export const sendEmailRequest = async (input: SendEmailInput): Promise<SendEmailResponse> => {
  const {userID, templateType, ...emailData} = input;

  // Idempotency check: Has this user already requested this email type?
  const existing = await emailRequestStore.findByUserAndTemplate(userID, templateType);

  if (existing?.status === "completed") {
      return {requestID: existing.requestID, status: "completed", alreadySent: true};
  }

  if (existing?.status === "processing") {
      return {requestID: existing.requestID, status: "processing", alreadySent: false};
  }

  // Create request, invoke worker, return
  const requestID = uuidv7();
  await emailRequestStore.create({requestID, userID, templateType, status: "pending"});
  await invokeLambda("email-handler", {emailRequestID: requestID, ...input});
  await emailRequestStore.updateStatus(requestID, "processing");

  return {requestID, status: "processing", alreadySent: false};
};
Voilà!
The Haps - January 2026
If I have a theme for this chapter, it's roots. Focusing on fundamentals in my practices. Making a move to a city that's very deeply home. And really taking time with my longest, most sincere relationships.
Houston, TX
Packing up to move to Houston in the coming weeks as of writing this! Boulder has been a lovely sabbatical, I'll miss the mountains, the snow, and several fast friends. But! I realized on a recent plane trip back to my hometown — the moment the humidity oozed into the cabin — that this was home!
Software
AI assisted development is in full swing across the industry! I appreciate the productivity gains and enjoy the opportunity to think at a higher level more frequently than I previously did in my work. Though, there is something missed when the craft moves several layers of abstraction up. I'm certainly of two minds about it.
With that shift well underway, I'm making dedicated time to more thoroughly studying principles and case studies around system design. If you have any recommendations, send them my way!
Still figuring it all out. You can watch me try by keeping up with my tech articles through the tech tag on my blog.
Music
Something is in the works! Nearly done, and excited to share soon.
Here's one of the major inspirations until then — early Japanese Shibuya-Kei group Capsule's Cutie Cinema Replay!
Phone Lines is out now! My first couple of tunes after a big break. Kitschy goodness, this was fun to work on. Hope you enjoy!
Or, you can listen to my own oldies-but-goodies. I'm still listening to tons of Frutiger Aero, so might I suggest SkyBox?
Art
Going somewhat underground here to establish deeper roots. I had a pretty steady cadence for a while of a piece completed a week. But my chops need developing, and my mind needs to wander! So I'm switching to sketchbooks and saving studies on the hard drive alone. I'm sure pieces will still float to the surface, all the same.
You can see what I've made through the Art tag on my blog.
Blogging
I don't think I can help myself from doing it, so anticipate more writings on creative practices, software, music, and amateur film criticism. Join the whimsy!
You can see the blog's year-in-review over yonder.
As synthetic data and words begin to increase it's portion in our collective daily diet, I still find oasis in the words, music, art, and general creativity of others. Thank you for putting your humanity out there if you do!
These words were hammered out with my digits on a keyboard to be viewed directly by your own physical inputs. If you took the time to do that, even just for a moment, you are sincerely appreciated.
So thanks for stopping by!
👋
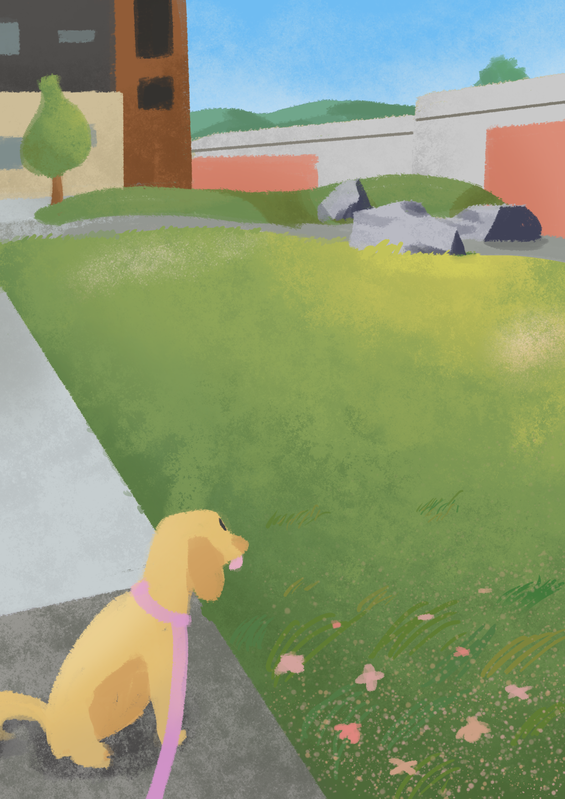
Little Mountain Park
There's this park near our new place that has these miniature mountains for the dogs to climb. Lucy loves them!
Open Source 1998
The change in spirit of the web and even open source itself is well encapsulated in a comparison between the 1998 version and the 2026 version of opensource.org. One dressed up and attending galas, and one handing out zines.
Perhaps one of the primary reasons for its success over the free software movement is in the marketing. From the Case for Open Source: Hacker's Version:
Mainstream corporate CEOs and CTOs will never buy 'free software', manifestos and clenched fists and all. But if we take the very same tradition, the same people, and the same free-software licenses and change the label to 'open source' - that, they'll buy.
One of the chief objections to using open source and free software during this time was around reliability. The case is made by Eric S. Raymond on the '98 page with a very period-appropriate angle:
Of all these benefits, the most fundamental is increased reliability. And if that's too abstract for you, you should think about how closed sources make the Year 2000 problem worse and why they might very well kill your business.
The several other case pages are fun to flip through since, of course, as it turns out, Eric was right.
2025
I'm very clearly a naturally reflective person. So I won't miss the opportunity this year to take stock of what was a very big year personally.
My intent from last year was to chop wood and carry water. Mission accomplished.
Creative Work
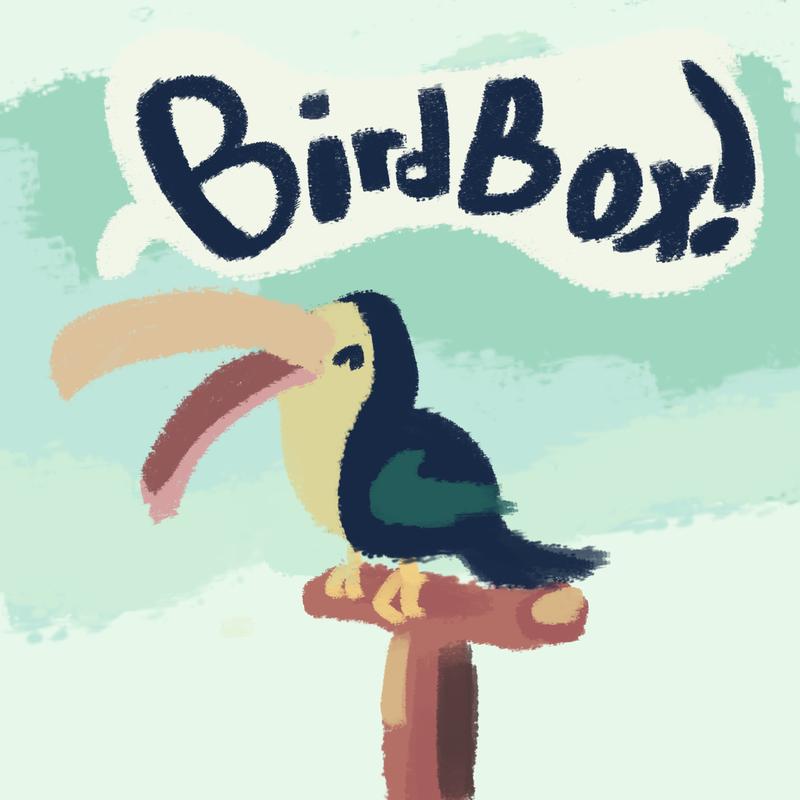
A couple of major projects! Bird Box is the biggest one. It was a blast making something that used a wide spectrum of the mediums I work in, all for one project.
Amethyst is still something I'm very proud of. A convergence of love for Drum and Bass, early CG, and the feeling of being drawn into a world, a la Myst.
Only one other non-project album, Goose Creek. Unless you count the whole moving out of state part. That was, indeed, a project!
More of a technical accomplishment, but it feels like home here now that I have music playing on this site.
Music
Proprioception!! I had a great breakthrough with being able to play piano with my eyes on the music and away from my hands this year. A huge accomplishment, and one that will accelerate my piano playing from here on out. It's breathed new life into playing as well. That feeling of soaring is there!
I gave a valiant effort for chord melody early this year, to then switch my focus over to Math Rock and Midwest Emo. Hoping to return to chord melody another time, with more chops and speed across the fretboard. Learning short licks, though, has been an energizing process. The quick loop of practicing and recording has been a great engine this year.
Listen to more music.
Art
In some ways a slower year, but a more interesting one. Gaining some fluency in Blender was a fascinating endeavor.
Much of my work has been beneath the surface here. My sketchbooks are fuller, and I've worked my way through a few more courses and books. This is one of those hard-to-quantify improvements from the year. Ultimately, I'm thrilled with the progress.
Summaries here:
Favorite pieces:
See more art.
Writing
Feels free and flowing. A big barrier to getting words on the site came from the feeling that I always had to make these thoughtful, polished posts. Not every piece required that, so I've leaned into Clippings and a Links Feed. The site feels more like a notebook in that sense, now, which helps with keeping me engaged openly with it.
Favorites:
Read more notes from the blog.
Software
Wild year for software. I have a few AI agents I've developed out in the wild now. And AI moved from being an occasionally helpful autocomplete to an entirely new way of accomplishing work. I'm still learning how to continue to best integrate AI-assisted coding into my workflow. But it has been quite the game-changer.
See more from the tech blog.
Reading
My reading hasn't been as prolific as years past, but what I did pick up, I thoroughly enjoyed. If I had to pick favorites:
See more on the bookshelf.
Web
A few websites, blogs, and creators I've truly enjoyed this year:
See more on my links page.
The Hard To Capture Bits
Lots of life happened this year:
2026 Intention
New projects and habits take a certain level of rocket fuel to break the atmosphere before coasting, reaching the chop wood, carry water phase. Several atmospheres have been broken for the past several years in my world. I have one more big one on the horizon in the coming years. So my intention for this year, somewhat similar to last year, is to simply keep going. Albeit — with a greater focus on "roots" as I've been putting it to Miranda. More foundational studies, more etude practicing, more learning around what doesn't change in software.
One other added twist: taking time to enjoy what's been accomplished so far. I have a tendency to always be pushing, learning, growing. What I find at year-end, when there's time to slow down and reflect, is that new things are born from a slow pace. This year would be a great one to dial back a few of the extracurricular practices above. Leaving room for what's next.
I doubt I'll be able to fully pull back. There's still more to learn, do, and accomplish this coming year. But, there are also many memories to make IRL, more play to have in the practices, and more daydreaming to do for the next chapter.
Happy New Year!
O Come, All Ye Faithful
Merry Christmas, everyone! ❄️
Album Player On Site!
It didn't feel very POSSE of me to have so much on this site as a source of truth, except for my own albums!
All the major players have their baggage in the music hosting/streaming space, unfortunately. Even previously humble Bandcamp has traded parent companies twice in the past few years.
And besides — I have to say there's a little something special in having music play on this lil' site — in the same way that a hand rolled pizza at home is different from a frozen one, eh?
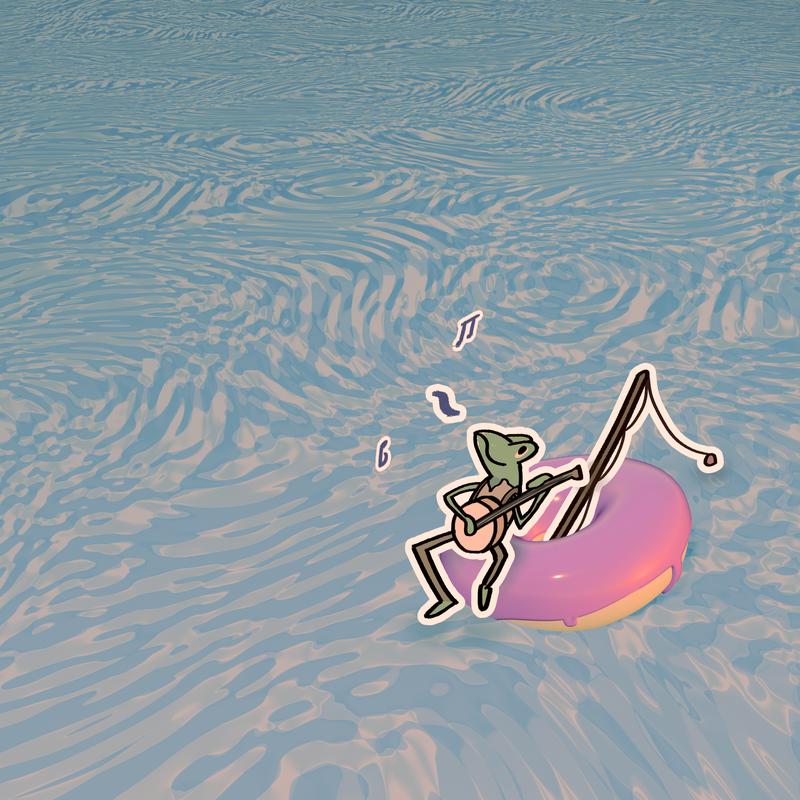
So I whipped a solution up this morning! See an example on the ol' Bird Box OST page.
Tech
For the technically curious —
The base html audio element, like so many others, comes out of the box with plenty of helpful attributes. There's some extra work to get a playlist style interface, but this is handled through those attributes. Namely: onEnded, which allows the player to continue to the next track, onTimeUpdate to visually show track place, and onLoadedMetadata for keeping tabs on the track length (helpful for visual slider for track time position)
const PlaylistPlayer = ({ tracks }) => {
  const [currentIndex, setCurrentIndex] = useState(null);
  const [isPlaying, setIsPlaying] = useState(false);
  const [currentTime, setCurrentTime] = useState(0);
  const [duration, setDuration] = useState(0);
  const audioRef = useRef(null);

  const handleTimeUpdate = () => {
    setCurrentTime(audioRef.current.currentTime);
  };

  const handleLoadedMetadata = () => {
    setDuration(audioRef.current.duration);
  };

  const handleEnded = () => {
    if (currentIndex < tracks.length - 1) {
      play(currentIndex + 1);
    } else {
      setIsPlaying(false);
    }
  };

  // . . .

  // part of the return:
  <audio
    ref={audioRef}
    onEnded={handleEnded}
    onTimeUpdate={handleTimeUpdate}
    onLoadedMetadata={handleLoadedMetadata}
  />;
};

export default PlaylistPlayer;
Funnily enough, the range input element works well for showing and adjusting the track position:
const handleSeek = (e) => {
  const time = parseFloat(e.target.value);
  audioRef.current.currentTime = time;
  setCurrentTime(time);
};

// . . .

<input
  type="range"
  min={0}
  max={duration || 0}
  value={currentTime}
  onChange={handleSeek}
  aria-label="Seek"
/>;
The rest is styling and a few more handlers in the React component.
Files are stored on AWS through S3. I had to whip up a script to upload and adjust my albums.js file en masse, a somewhat tedious task since many older albums were not quite as organized as my newer ones. Left plenty of time to get nostalgic!
Give it a whirl! Visit any of the albums on my music page.
Painting Studies
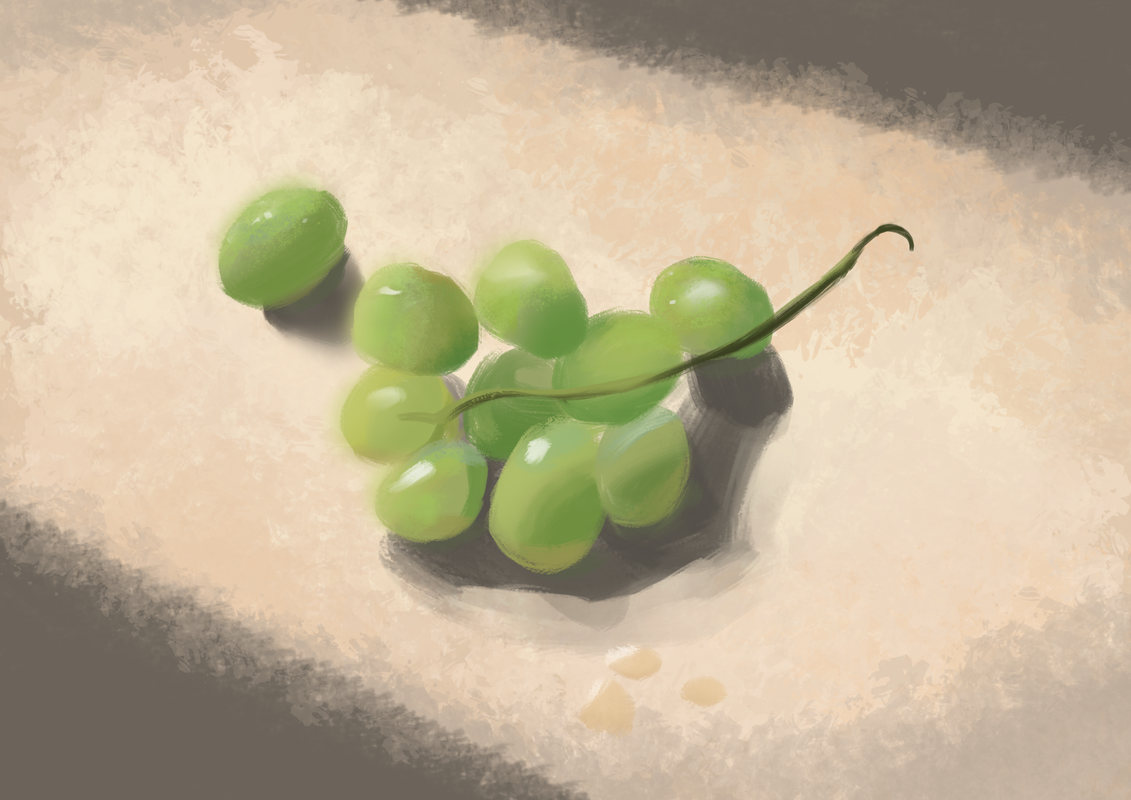
A series of studies done as part of Jeremy Vickery's Painting Light course.
One fellow student left a note saying that the course felt a little like the draw the owl meme. There's some truth to that — for the most part, Jeremy is providing a set of photos, telling you what sort of aspects of light to look for, and then having you take a jab at it on your own.
I was having this conversation recently where I shared that, looking back, great teachers do a lot for their students. But I think the benefit many people are really looking for is permission to do a project, and holding a container for doing the work. On the surface, that's a low bar. In practice, though, it's highly valuable and not so simple to do.
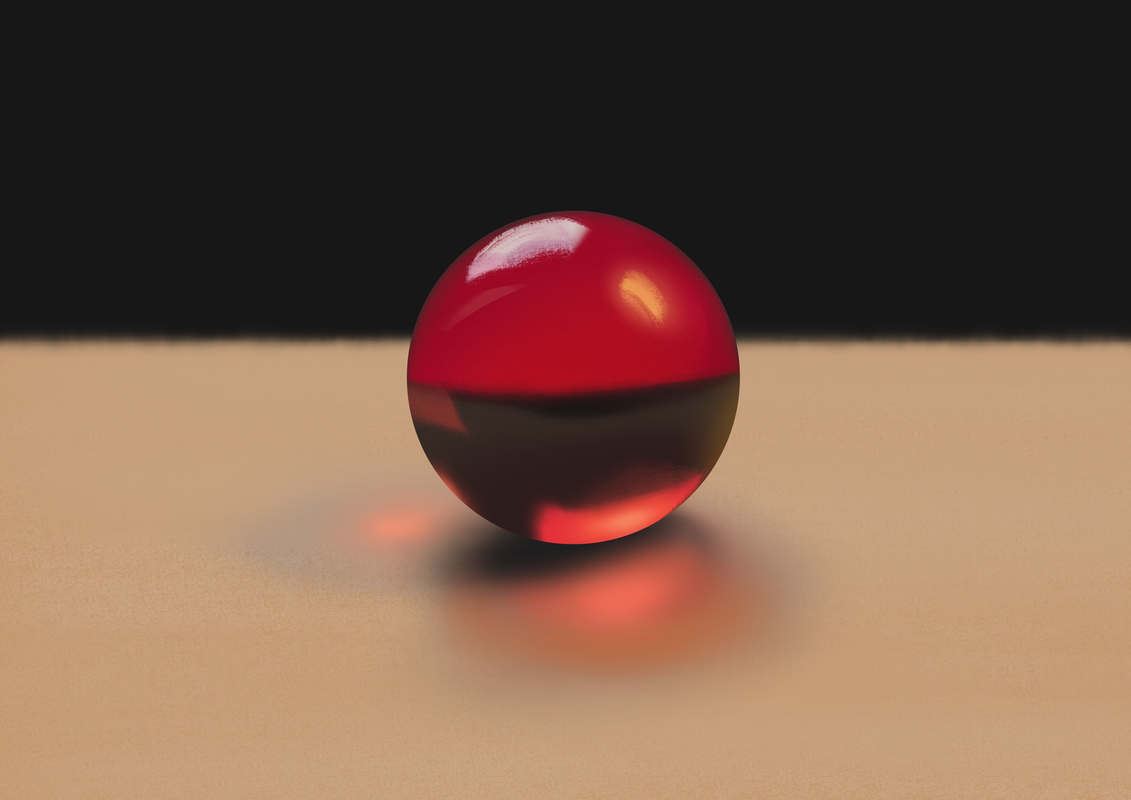
The drop into the deep end of observation is part of the strength here. By starting in observation, it's possible to paint anything you see. From there, then technique, construction, lighting principles, etc. can help streamline that process and lend to further creation from imagination.
The biggest "Aha" for me was in the images above and below. Both highly reflective material, I assumed they were advanced subjects. At the end of the day, though, once you sit down and really observe what you're seeing, there's not much more you need to know or do. You simply draw whatever truth is in front of you.
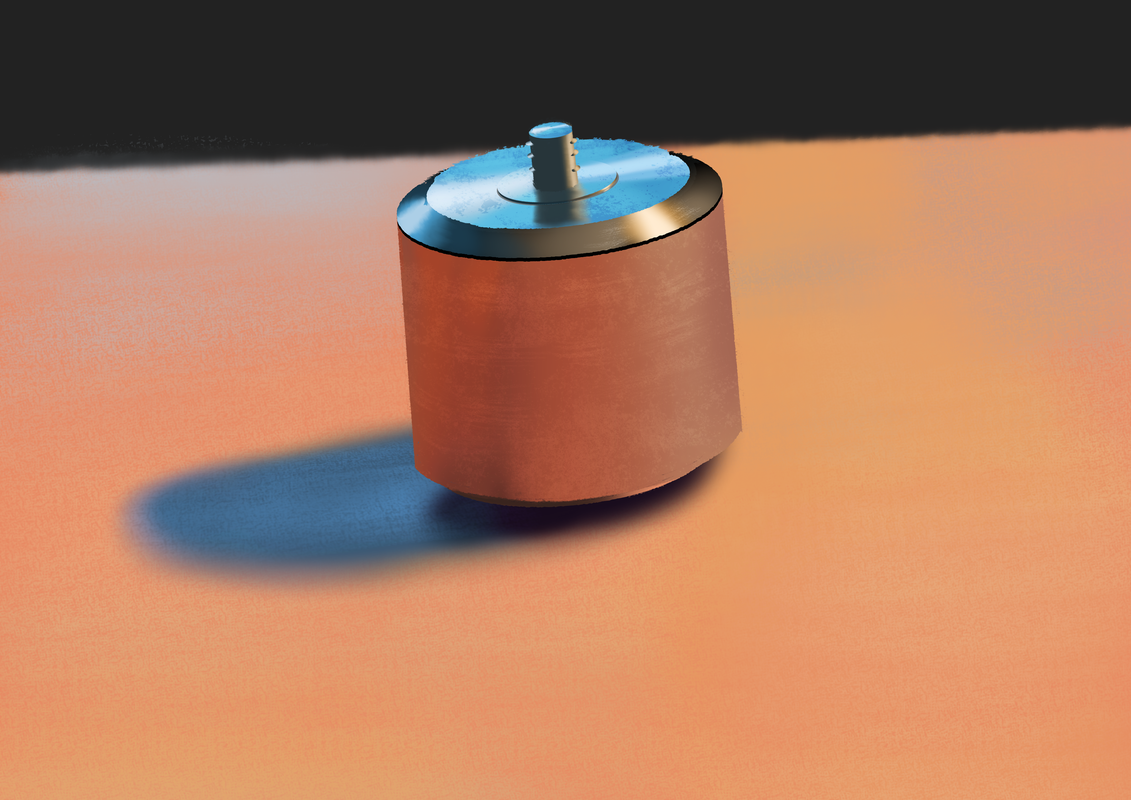
More to do next year in the course! Excited to keep going. I've also added this to my handy-dandy page of learning resources.